
REVIEW · MOUNT ST HELENS & CASCADES TRIPS
Mount Baker Climb Tour from Washington
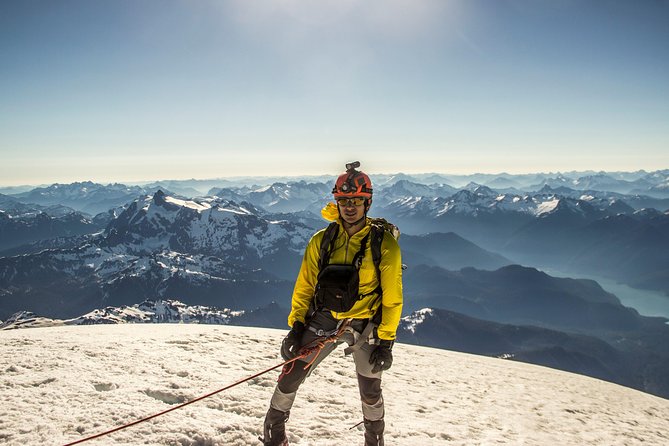
Mount Baker teaches fast and up close. This 3-day climb is a hands-on start to mountaineering, with Mount Baker and its glacier routes as the classroom, and a professional guide running the rope team and coaching you through real terrain. I also like that the price covers the essentials you normally have to chase down yourself, including permits, tents, stoves and cook kits, and the group glacier equipment.
The one drawback to plan for is weather. Bad conditions can shift summit timing or even force a turn-around, and the trip may re-shape itself around safety, so you need a flexible mindset from day one.
Key points that make this Mt. Baker climb worth your time
- Small groups (max 15), which makes hands-on instruction and rope-team practice feel realistic, not rushed
- Easton Glacier or Coleman-Demming route, with route-finding through icefalls, seracs, and crevasses
- Skills training built into the climb, including ice axe arrest, crampons, rope management, and navigation
- Permits covered in the price, plus tents, stoves/cook kits, and group climbing equipment included
- A gear check at least three days before, so you learn what matters and what you can leave behind
- A safety-first summit call, with schedule changes possible when visibility or conditions turn
Why Mt. Baker feels like a real mountaineering classroom
Mt. Baker sits in the Mount Baker-Snoqualmie National Forest, and it draws people for one simple reason: it’s a legit glacier mountain. On this tour, you’re not just walking to a viewpoint. You’re learning glacier travel the way you’ll need it later, on harder Cascades objectives and beyond.
What makes the experience especially useful is the mix of “moving” and “teaching.” You practice essential techniques like ice axe arrest and crampon use, then you apply them in the same environment where the risks are real. That matters, because glacier skills are not about memorizing steps. They’re about doing the steps correctly while cold, tired, and focused on where you’re placing your feet.
I also like that the guides treat this like training, not a sightseeing hike. The tour includes pre-trip planning and a packing and gear information session, plus a gear check at least three days prior. That reduces the most common beginner problem, showing up with the wrong stuff, or packing too much while missing something critical.
Still deciding? These Seattle bookings are the ones travellers keep coming back to.

Easton Glacier vs. Coleman-Demming, and why route-finding is part of the lesson
This climb runs the Easton Glacier route or the Coleman-Demming route. Either way, expect real glacier terrain and real decision-making, including route-finding through icefalls, seracs, and around large crevasses.
Here’s what that means for you. Glacier travel is not linear. Even when your goal is a summit, your “path” often shifts with conditions, snow bridges, and what the team can safely navigate. Learning to move through a changing glacier environment is part of what you’re paying for.
If you’re the type who likes clear structure, you’ll probably appreciate how the guides guide you through hazard assessment and route-finding. You’re not guessing alone. You’re learning why the team chooses one line over another, what you look for, and how you think when the terrain gets complex.
Also, the tour explicitly builds in navigation and hazard assessment as covered skills. That’s important, because on glaciers, you can’t rely on trail markers. Your map sense, your terrain reading, and your ability to assess risk all work together.
The core techniques you practice: crampons, ice axe arrest, and rope teams
This is where the tour earns its “intro to mountaineering” reputation. Before summiting, you learn fundamentals for safe glacier travel, including:
- how to use crampons
- how to position the ice axe and perform self-arrest
- how to attach and move as part of a rope team
You’ll also get training on walking techniques with and without crampons, plus climbing knots for rope systems. This is practical stuff. If you’ve ever watched people clip into a rope team and wondered how it all works, this tour turns that uncertainty into muscle memory.
The goal is not only to get you to the summit if conditions allow. The goal is to make you competent in the basics of alpine movement. The tour mentions preparation for intermediate climbs afterward, including Mt. Shukson and other more challenging routes in the Cascades, and potentially overseas. That tells me they’re aiming for skill-building, not just summit chasing.
And from an emotional point of view, there’s comfort in learning these methods in a group with a strict safety standard. Guides like Josh, Simon, Andrew, Sam, Caleb, and Drew are highlighted for safety-first calls and for coaching that helps you feel secure in your rope team. Even when the weather ruins the summit attempt, the teaching time can still leave you better prepared for your next climb.
Gear check and packing: the quiet part that makes or breaks glacier comfort
A lot of beginners underestimate packing. Cold glacier days punish every bad choice, from bulky items you keep having to drag to missing essentials you only realize once you’re already on the mountain.
This tour tackles that directly. You get pre-trip planning, plus a gear check at least three days before the climb. You’ll work with the guides to find the balance between packing too much and leaving something critical behind.
What you gain from this is not just a checklist. It’s perspective. You learn how to think about weight, warmth, and usability. And because stoves and cook kits are included, you’ll want your system to support cooking and hot drinks during the trip, even though meals and hot drinks are not included in the tour price.
So, while the tour covers a lot of the group gear, you still need to show up prepared. The guides do the coaching, but they can’t turn an ill-packed personal kit into a warm, smooth trip.
Day-by-day rhythm: training, then the summit window, then a managed exit
The itinerary is about three days, and you should expect an approach that builds from skills to exposure.
Day 1: getting your feet right on glacier terrain
Day one is where the tour puts the “lesson” in “climb.” You’ll learn and practice key glacier travel basics: crampon technique, ice axe handling and self-arrest, and rope team attachment. You also get the foundation for rope management, knot knowledge, and how to walk efficiently when the surface is unforgiving.
This is also the day when safety habits form. Hazard assessment and Leave No Trace principles are included as covered skills, so they’re not treated as a last-minute lecture. Instead, you learn the why and the how while you’re actively moving.
- Beneath The Streets Underground History Tour★ 4.5 · 8,006 reviews
- Chef Guided Food Tour of Pike Place Market★ 5.0 · 3,733 reviews
- Mt. Rainier National Park Highlights Tour★ 5.0 · 3,156 reviews
Day 2: summiting if the mountain agrees
Summit attempts happen in a window of conditions. The tour is explicit that weather can change the plan, and that the summit day may shift to the second day, with a sleep-in on the third day for a relaxed hike out, depending on conditions.
That’s real mountaineering logic. Visibility, wind, and stability matter more than your calendar. When the team has to make a call, the tour expects you to accept it calmly and learn from it.
From the way guides are praised for safety decisions, I’d take this seriously: if the guide calls for a turn-around due to unsafe conditions or poor visibility, that isn’t a failure. It’s the correct decision in a high-risk environment.
Day 3: skills reinforced, then a calmer hike out if you need it
If conditions cause changes, day three can be more relaxed, like a sleep-in and then a hike out. Even if you don’t hit the summit on the first attempt, the structure can still produce a strong outcome: you get practice time, instruction time, and a chance to leave the mountain with usable skills.
The tour also signals this as a planned teaching approach, not a scramble. That’s why people often walk away feeling prepared to try again sooner, because the mountain still served as a classroom.
Cold weather camping and Leave No Trace, not just summit talk
Glacier climbing is cold work, and you need systems for sleeping outside, handling gear, and staying clean enough to function tomorrow.
This tour includes cold weather camping skills and Leave No Trace as covered skills. That means you’re not learning these ideas from a poster. You’re learning them while you’re actually camping in alpine conditions, which is when the details matter most.
And when you combine camping skill with rope team and navigation practice, you get a full “day on the mountain” picture. You’re learning the whole workflow: move safely, manage your rope and equipment, assess hazards, and reduce impact while you’re there.
Price and logistics: what you get included, and what costs extra
Here’s the value story as it’s presented. The tour price includes:
- All permits
- Tents
- Stoves and cook kits
- Group climbing equipment
- Guide services
- Pre-trip planning and an information session on packing and gear
- Backpacking, mountaineering, and general outdoor safety skills
What’s not included is also clear:
- Transportation
- All meals, hot drinks, and snacks
- Gratuities for guides
When you judge value, the permits and key group gear matter. If you were planning this yourself, permits, tents, group equipment, and guide time are the heavy hitters that push costs up. By wrapping those into one guided package, you reduce the hassle and the risk of forgetting something that’s hard to solve on short notice.
Transportation is the main practical gap. The tour says they can help arrange carpools, or transportation can be provided for extra fees. So if you don’t have a ride, ask early and plan your departure around the start time.
Also note the tour uses a mobile ticket, and it’s offered in English. Confirmation comes at booking time, which helps you stay organized.
Who should choose this Mt. Baker tour
This climb is described as for experienced hikers who want to start mountaineering. You also need moderate physical fitness.
If you’ve done hikes on steep terrain but haven’t trained on glaciers, this is the right bridge. The skill list is exactly what a transition climber needs: crampons, ice axe arrest, rope management, navigation, hazard assessment, cold weather camping, and Leave No Trace.
If you already have solid glacier skills and you want a purely athletic objective, you might find this more structured than you need. But for most people aiming at their first real glacier mountain, the guided coaching and small group limit make it a smart way to learn without chaos.
Booking mindset: how to plan for the summit without stressing
Even if you arrive confident, Mt. Baker can be unpredictable. The tour specifically states summit timing may change and conditions can force adjustments. So I’d set your expectations like this:
- Go in aiming for the summit
- Stay ready for a different outcome
- Treat the learning as the win
The guides are praised for safety-first decisions, and the tour’s structure reflects that. If you get poor visibility or unsafe route conditions, the team may shift the plan, and you’ll still practice the core skills.
That’s also why a third-day sleep-in and a relaxed hike out is mentioned as a possible change. It’s a reminder that the goal is safe completion and real training, not just checking a box.
Should you book this Mt. Baker climb?
Book it if you want a true mountaineering on-ramp, with permits, tents, and glacier gear handled, plus structured training on rope systems, crampons, and ice axe self-arrest. The small group cap also makes a difference, because you’re more likely to get hands-on coaching while you’re learning.
Skip it or consider a different option if weather uncertainty would stress you out too much, or if you prefer an itinerary with minimal changes. This tour can shift summit plans based on safety, and that requires the right mindset.
If you’re ready to learn glacier travel the grown-up way, this Mt. Baker climb from Seattle is a strong choice.
FAQ
How long is the Mt. Baker climb tour?
The tour is listed as 3 days (approx.).
Where does the tour start?
Start is in Seattle, Washington. You meet at a convenient Park and Ride in the Seattle area at 8:00 AM.
What time does the tour begin?
The tour lists a 7:30 am start time, with pickup at 8:00 AM at the Park and Ride meeting point.
Is the tour capped at a small group size?
Yes. The maximum group size is 15 travelers.
What route does the tour use on Mount Baker?
The tour takes the Easton Glacier or Coleman-Demming route, depending on conditions.
What skills are covered during the climb?
Covered skills include ice axe arrest, crampons, rope team attachment and rope management, climbing knots, navigation and route finding, hazard assessment, cold weather camping skills, and Leave No Trace.
What equipment and permits are included?
All permits are included. The price also includes tents, stoves and cook kits, and group climbing equipment, plus guide services.
What is not included in the price?
Transportation, all meals, hot drinks, and snacks, plus gratuities for guides are not included.
Do guides provide pre-trip support?
Yes. There is pre-trip planning and an information session on packing and gear, and a gear check at least three days prior to the climb.
Is the trip refundable if I cancel?
No. The experience is non-refundable and cannot be changed for any reason. If the minimum number of travelers is not met and the tour is canceled, you will be offered a different date or a full refund.
More Tours in Seattle


More Tour Reviews in Seattle
Newest on the Seattle desk
- Seattle: Twilight Tour and Olympic National Park
★ 5.0 · 3 reviews - Where the Hops Grow! Yakima Brewery Tour
★ 5.0 · 3 reviews - Forks Town, Twilight Movie, Olympic Small Group 1 Day Tour
★ 5.0 · 3 reviews - Tacoma & Gig Harbor Hotel Transportation To/From Seattle Airport
★ 5.0 · 3 reviews - Awesome Scavenger Hunt: Seattle By The Sound
★ 3.5 · 3 reviews
Mount St Helens & Cascades Trips, side by side.
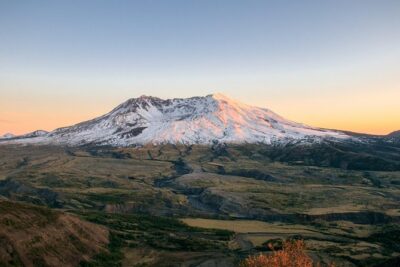 ★ 5.0Mt. St. Helens National Monument from Seattle: All-Inclusive Small-Group TourFrom $344129 reviews
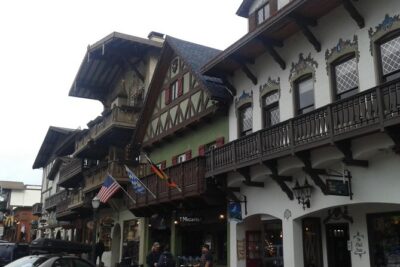 ★ 5.0Luxury Leavenworth Day Trip through the Cascade MountainsFrom $35261 reviews
 ★ 4.0Small-group Mt. St. Helen National Park Tour from Seattle in SUVFrom $37511 reviews
 ★ 4.7Mt. St. Helens National Monument Small Group TourFrom $3269 reviews
 ★ 4.0Leavenworth and North Cascades Sightseeing TourFrom $1259 reviews
 ★ 5.0Private Cascade Mountains and Waterfalls Tour from SeattleFrom $3526 reviews
 ★ 3.0From Seattle – Enchanting Mt Baker and Cascades Tour in SUVFrom $3956 reviews
 ★ 5.0From Seattle: Mt Saint Helen TourFrom $2855 reviews
Seattle pages with this tour